I could give you bullet points or number the reasons out for you.
It's not that organized.
It's like a gambling addiction. It's like x-mas/Hanuka/Kwanzaa. It's like a blind date.
You know what your heart is asking for. You know what your eye wants to see. You know what you want those spinning fruits should look like after you pull the metal arm using your last quarter.
You don't know till you see it from the film lab. There is a surprise in
Multiple Exposures that no other photography gives you.
More importantly:
I want to shoot what isn't there. What's in our minds. Melding images together the way our memories come to us. Not clear sharp pictures, but thoughts and emotions bleeding into each other tangentially. Cued by images from our that temporal experience. When you remember a party, you don't remember a single picture of everyone dancing in the living room. You remember the soft but dirty couch you sat on, the ugly chandelier that lit the room, a tree you stared at while sharing a cigarette outside, that one really funny guy you met while waiting in line at the keg, the hallway to the bathroom you walked down too many times, an ugly rug, and that tattoo on that girl's back you couldn't stop staring at all night. It all melds together into one impression.
That's what Multiple Exposures can do that singles can't.
Capture life the way you remember it and not the way it happened.
Let me start with how I found out about this whole analog camera/Lomography movement and tell you what ensnared me. I probably should have started the blog this way. Seems important, now that more people are asking me about it.
My phone has apps. One of them was a filter app for your camera. Different effects. I wanted that. Better than the average pics it already took. I picked up CameraBag. It had an option called Helga. I thought the effect was very cool. Neat colors and some darkening around the edges.
At this point in my life, Oct. '08, I had a small digital point and shoot my dad gave me a year before. I had used disposable cameras at summer camp and had dad's old Advantix camera in my closet. I was of the mind that cameras got in the way of enjoying vacations. Of enjoying the moment. I chose not to carry one. The digital fit in my bag I always have with me. I used to it chronicle my trips and taking pictures of myself jumping on hotel beds.

It was fun but it wasn't more than something to do because it was silly and everyone needs new social network pics. Around that same year, I had my friend tell me about the concept of
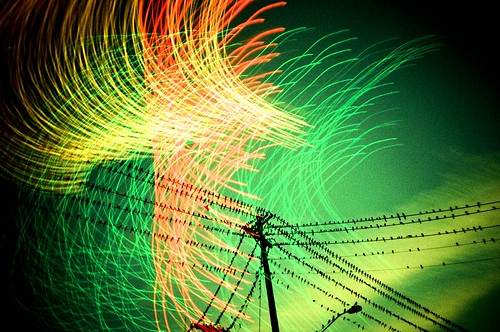
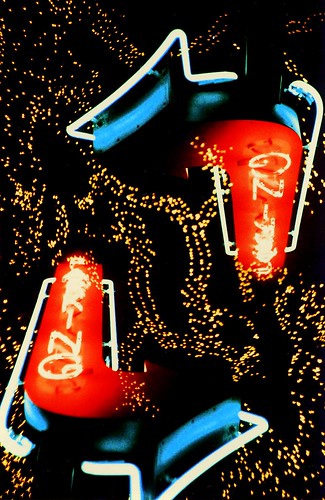
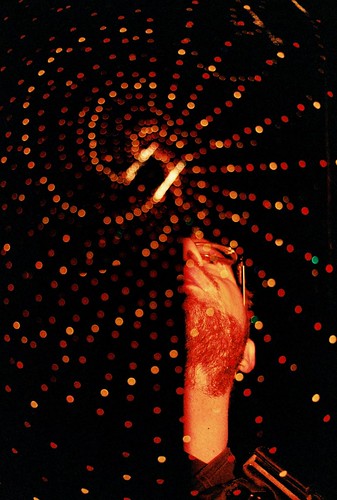
"Shutter Drag" or dragging shutter. I realized there was things outside the normal realm of photography. I hadn't seen much art photography or had any favorite photographers. I started using dragging shutter to create odd light drawings with the ambient light sources around me. I just set the little digital to fireworks mode and adjust the seconds it stayed open. I ended up with things like this:

So, in a way, I was already starting to look for specific things when I was out at a concert. Weird lights I could point my camera at and move it around. It wasn't something I thought much about. I was just another person with a digital camera. Taking pictures of bands I saw, wheatpastes, graffiti on trains as they pass...
But Now I have found this filter that makes pictures look more magical. Colors that somehow reach in and touch me in a spot. A new spot? One I was already courting? Who can say?
CameraBag app
Helga filter
I get curious when reading the app reviews. They say this Helga is trying to be like a
Holga. That the app is lame because it could never duplicate the beauty the camera captures. People should really read app reviews. I sit at a desk all day, for my current job, so I did some internet sleuth work. I found the camera pretty quickly. It wasn't that well hidden in the sub-culture webs.
I see the pictures it takes before I see the camera.
I get it!
The pics have that same quality that I was starting to love in the app, but somehow it did feel more right. The colors and tones were more ethereal. I found the camera next. I was surprised at the size and the odd film it took. I looked at the price of the camera. I was tempted to buy it right then. I started to think about 12 shots. Film cost. Processing costs. My bills.
I filled it away for x-mas wish list.
But I kept looking. What's this
"Lomography" stuff? A whole Society? They've got so many cameras and I'm already a confused analog film newb. I saw a
Supersampler and a
Colorsplash on their site. They looked the simplest but with some fun gimmicks.
I had a full x-mas wish list, now.
I read more about them as the holidays neared. I found out about
Multiple Exposures as an option or ability of the cameras. I didn't know what they meant. They said it could do multiple exposures... What are they like?
I looked up examples and thought they were interesting but kind of messy. Fun idea, but I wouldn't know how to use it...
Cogs started turning. I thought about
combinding things. In my early, no experience in film days, I had all sorts of pie in the sky ideas. I was gonna put people's faces with all sorts of stuff. Mountains, fireworks, animals...
By the time the holidays rolled around, I had assigned each parent a camera I needed. I ordered the SuperSampler before I left for home.
My parents love me! We had that moment of opening up your gift and then explaining to everyone why it is such a cool things and all the stuff you can try and do.
They nod and think it sounds neat.
Meanwhile, I'm searching for batteries and film!
I started shooting that day with the Colorsplash and the Holga 120CFN.
Both cameras come with booklets showing a wide variety of things you can do with them and tips on how to play with them. The Holga 120CFN book had several examples of
Multiple Exposures. These were far cooler than what I had seen on browser-based image searches. Perspective shifting on subjects and textures mixed with landscapes.
I loaded both cameras and did what any man does. I started shooting and trying to figure out how it worked as I went. My Holga roll had the square frame it it, but I had the arrow pointing at 16, so all my pics overlapped at the edges.

As you can see, I also didn't understand that overlaying of
multiple images would give the film too much light, if you didn't adjust for it. You get busy pictures that all want your attention.
I remember getting my first roll back and being pretty sad. Like asking Santa for a the
"Red Rider BB Gun" but getting the rabbit pajamas, instead. I had seen all these magical pictures but none of mine worked and some were down right uninteresting. A few looked ok, but I was crest fallen.
The camera wasn't magic. It didn't make everything I snapped a picture of magical. It captured what I pointed it at. I didn't shoot my second roll as quickly. I did use the Holga off and on, but I was a little discouraged. I think that happens to a lot of people that try this camera for the first time.
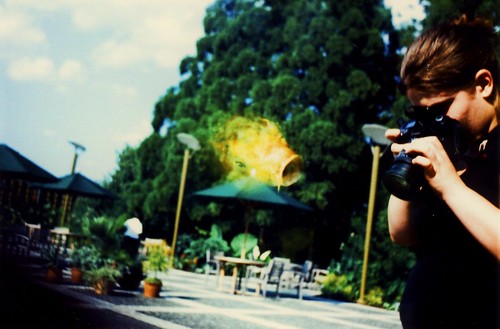
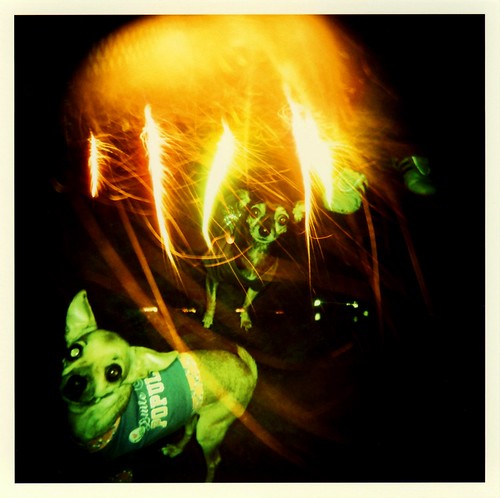
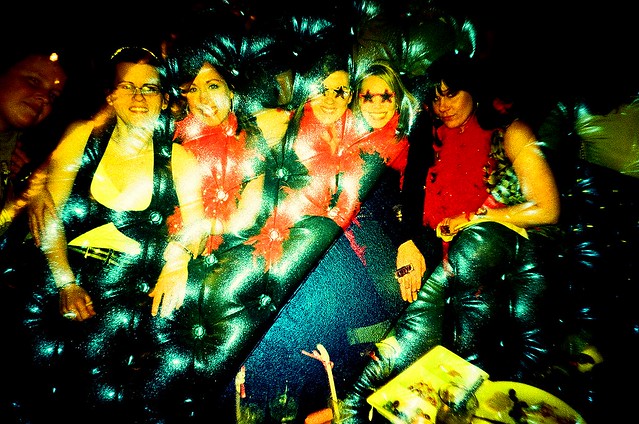
I didn't give up. I took my Colorsplash to clubs and parties. I would pop a flash on someone and then use a drag shutter to catch some light trails before it would close. After a few of those types of pics, the flash popped a second time when I released the button. I figured out a way to do a fake
doubles on the Colorsplash. I could capture two things at night if I popped the flash on a subject, covered the lens, and then waited till the flash recharged. Then, I would aim it at something different and release the shutter for a second flash.
I had a more portable camera that I could trick, but only at night.
About 3 months later, I was getting frustrated/excited about the possibilities. I liked the Holga, but it was too big to carry with me to things without worrying about it or it getting in the way. I also had little control over the light intake on it. I had
modified the aperture arm, but I couldn't really get a handle on the
doubles I wanted to do. The Colorsplash was fun, but still a little difficult to pocket and I could only double at night with some effort.
My tax return came in around early-mid March. I had started browsing cameras again. Looking for something on the Lomography site that would get closer to my needs.
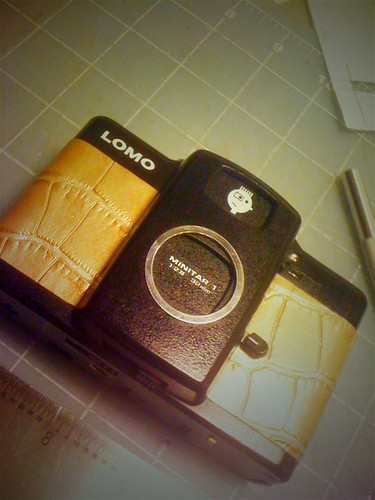
The
LC-A+ caught my eye. It was supposed to be the one that started it all. It had an ISO adjustment to control light intake. It had a
Multiple Exposures (MX) switch, that let you crank the shutter without touching the film advance. It looked smaller and more easy to handle. There were plenty of other features I didn't know I would like, as well. I dropped the money on the one with the original Minitar lens from the Lomo company. It was 30 bones more, but whats 30 when you're already gonna drop 250, right? I wanted to play with the real deal, even if it was made in China.
I got it in about a week later and tore open the package with a restrained reverence while eating lunch. Didn't wait to get home. I bought it at a good time and received 6 rolls of film, 2 tea cups, the LC-A+ book, and cable release, and a Colorsplash flash.
It felt sturdy. It had weight the others hadn't. It felt like something substantial in my hand. Little did I know, this wouldn't leave my side for the next, almost, year and a half. Two exceptions: I left it at my Dad's hotel after a rehearsal wedding dinner for my cousin and one when I was asked to leave a lady's abode rather quickly. Both times I retrieved it before 24hrs. It has become a comfort blanket for me.
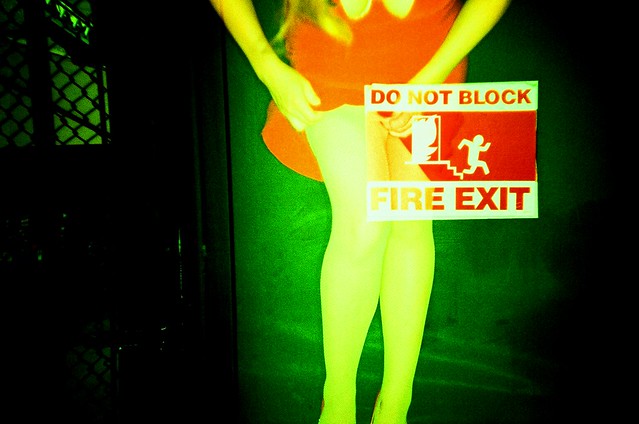
I shot my first roll that night, when I went to a show at a theater downtown and then saw a friend's band. I still had no idea what film ISO was. I only knew that you set the dial on the camera to match and the rest wasn't your responsibility. It took me another 2-3 months before I started questioning that part of photography. I finished the roll that night. Here are a few of the shots that I got back the next day.
I was convinced. This camera had the magic I was looking for in the others. It had to be the camera. I hadn't done this cool stuff with anything else. I had no training, classes, or people giving me pointers. It can't be me. I thought this for a few months.I would show people the pictures I was taking and they would say they were pretty neat. Then, I would tell them that it wasn't me. It was the camera. It made things look so cool and it was so easy to use.
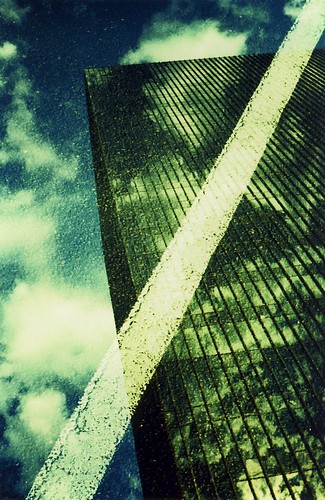
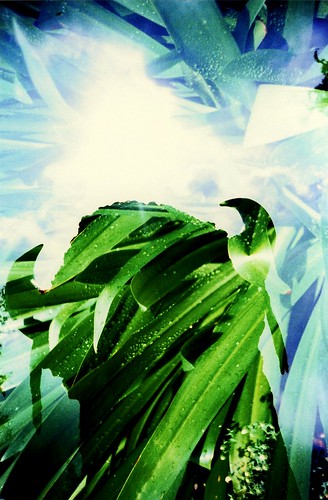
I started shooting everything that I thought would look neat. I refused to use my viewfinder. The online folks had said the Holga viewfinder was pointless, due to its positioning. I figured it was the same for the LC-A+ and I shot for the first 6 months without a look through it. I later found out the LC-A+ has a fairly accurate viewfinder. I started using it about half the time. I was going through a roll or two a week and trying out
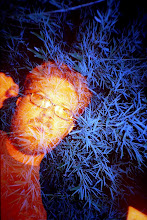
Multiple Exposures on anything that occurred to me as I walked around.
Skip to now. A year and a half later I am way down the rabbit hole. I have 20 plus cameras and most of them can do some multiple exposure work. I've shot over 5000 photos with my LC-A+ & 75% are
Multiple Exposures. I, uncertainly, bought a second one, with my last tax return. I kept wondering if buying another instead of investing in; a different camera, film, or processing was the right choice. It was to serve as my primary camera and the original as a backup/loaner/texture roll shooter. My MX switch on the original looks like this, as of 6 months ago:

My fingernail has slowly been shaving the edges off the ridge the switch moves along. My first one's film advance locked two weeks after I got my new one. I sent it off for repair. The universe had spoken, though. I had been right.
A long explanation? Yes. Did you read this far? Now you know my background on this, you can see that I'm fresh to this world of photography and self-taught.
So why do I love Multiple Exposures?
I'm not the first to do it. What amazes me, is that more people aren't doing this. The photo world has been making a steady transition to digital in the last 8 years, now that it is affordable. Everyone is taking pictures of exactly what is there. I could stand in the same spot and take the same picture with the same gear. Being a photographer is becoming more about the right time and place then the art, in my opinion.
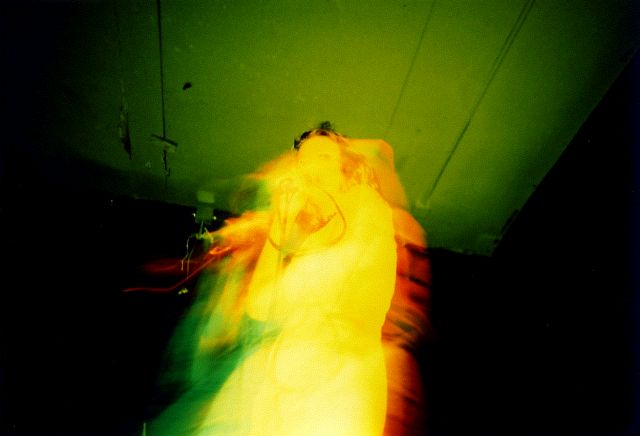
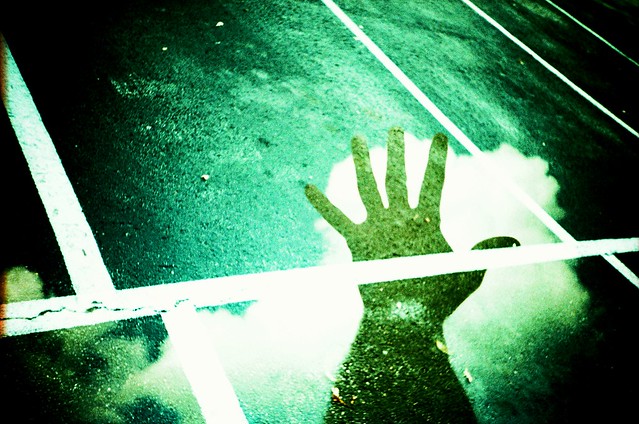
I see
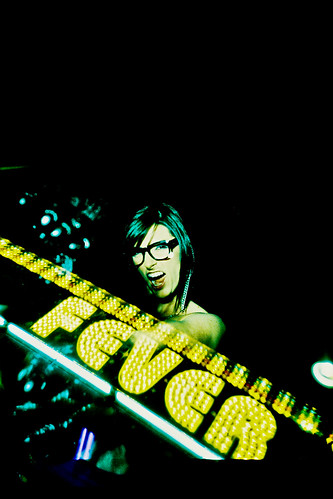
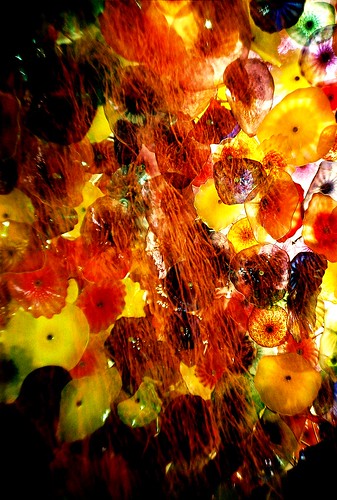
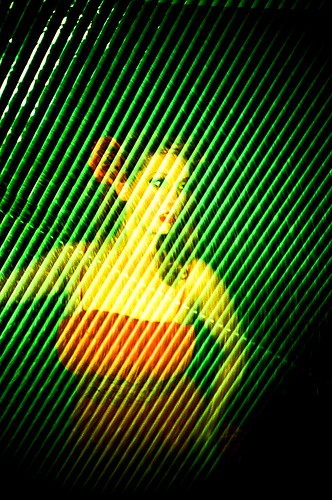
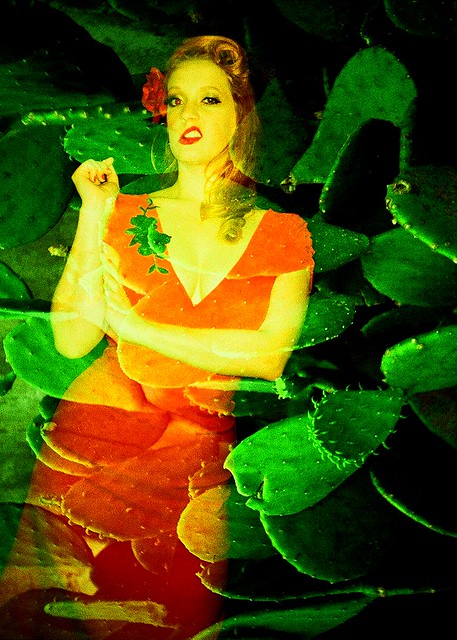
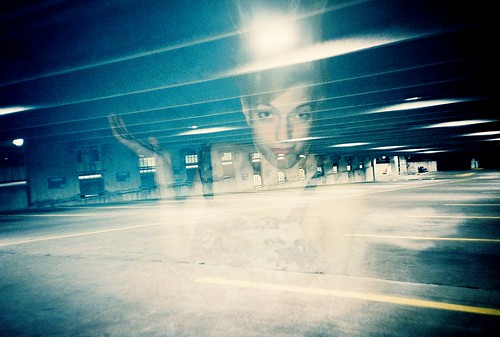
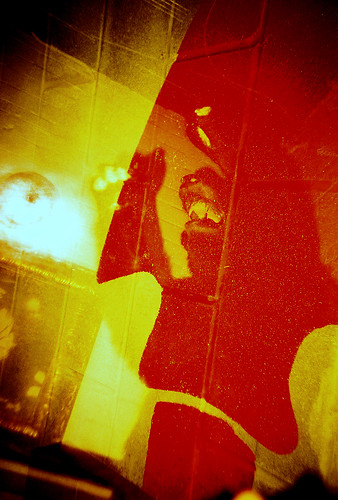
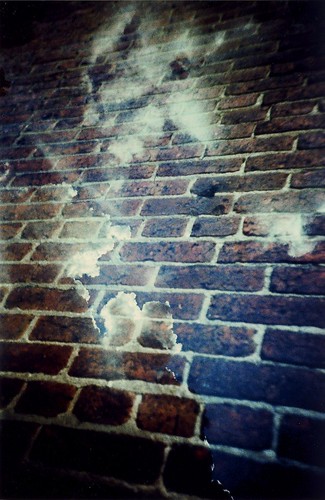
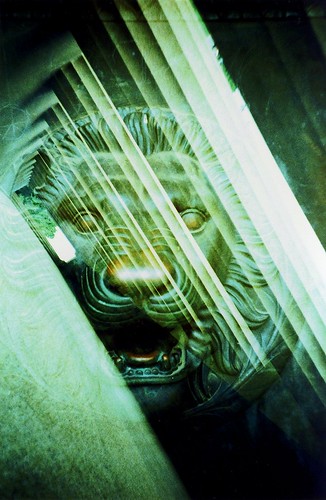
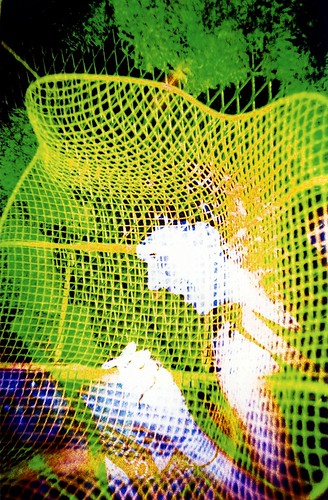
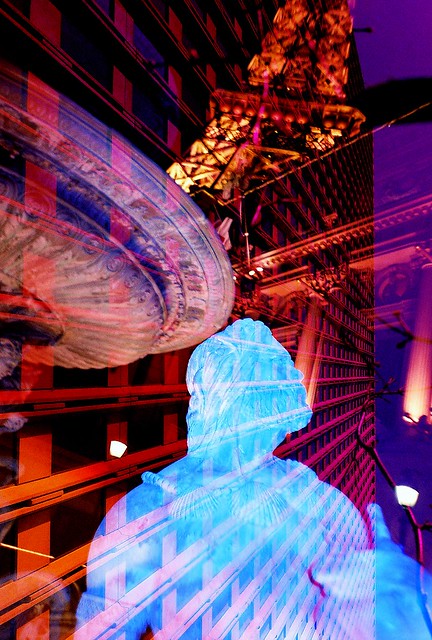
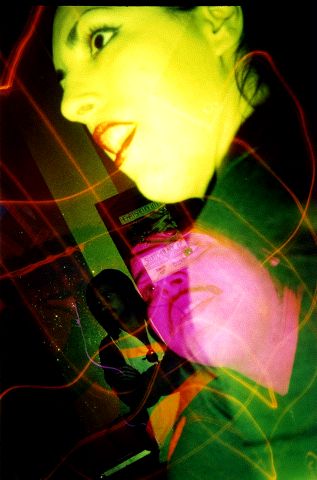
Multiple Exposures as a way to take the best of two photos and makes something better out of the sum of their parts. Whether its a random double:
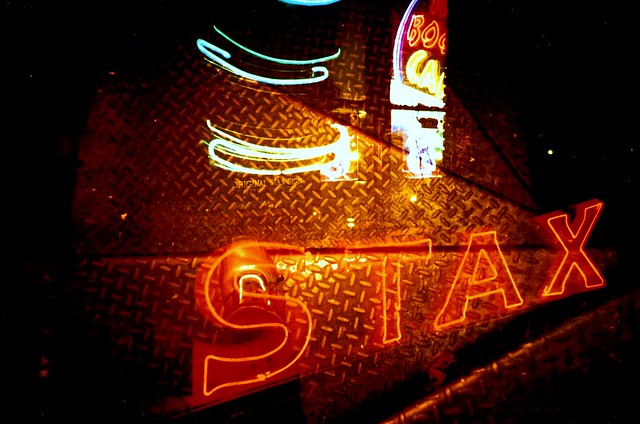
or a planned out studio shoot

You end up with something far more magical and unique than they would have been individually.
The way I see it, people have been taking pictures of what's there for over a hundred years. There are a huge amount of amazing pictures from all of this work. I am not saying that I don't get amazed by
Ansel Adams or
Halsman or
Paul Outerbridge. I discover new inspirations from old photography more often. Everyone has their vision of what they want to shoot.
What I don't get, is why more people aren't doing
Multiple Exposures photography? Let's take pictures of what we interpret reality to be. I think it's a genre that has a huge room for discovery and expansion. I see amazing shots by people that have mastered this in a way I haven't even grasped, yet. I think it is due to several factors.
It's confusing.
Most people I talk with about
multiples, are single exposure photographers and lay people. I explain my methods. I let them know about colors that don't mix. How busy multiples are messy. I send them off with a loaner camera and a confused but eager glint in their eye. They come back with the same things. They didn't know what to mix it with, the images overlap too much and nothing's clear, or they just shot a lot of subject matter that didn't work with each other.It seems like folks either get it or they don't. It's a talent in the same way shooting good or powerful singles shots is an amazing talent. I wish I could shoot the single exposure photos I see done by photographers I admire.
Popular Culture Hasn't Produced A Famous Multiple Exposures Artist
You say, wait! I can name three people off the top of my head. Did you find them on your own? Were you taught about the work they produced while getting your photo degree? The layperson and your average photographer are barely aware of multiple exposure photography. Due to it's recent use in ads on TV and magazine, people are just now becoming aware of
Long Exposure Photography. Namely, Light Drawing.

If more people are to explore this medium and help us flesh out new ideas, more of the experts quality work they produce needs to get exposure. You have no idea how many times I've explained what I do, to people. They start out confused and then show vague signs of understanding. The only reason I get that far, is most people with a film camera have accidentally done one or two in their lifetime. They thought it was weird or an ugly mistake and tossed it. No role models exist. Do a quick online search for
Multiple Exposure Photographer. You see one photographer's site listed on the first page and his site isn't even active, save for the multiples section. We need the folks at the top of their "Multiples Game" to make themselves more known on the web.
There isn't much info for doing this, on the web
I had to dig through Lomography tipsters and page after page of web searches to find the little bits I did find. Recently I located a fairly
detailed guide, but it isn't accompanied by any pictures to illustrate its points and it is the first inch of the tip of the iceberg. They don't cover color affect, shadow usage, cameras that are better for this type of photography, or even the different ways you can set up doubles (ie. In camera or re-shooting a roll you've pre-marked) There are so many photo tutorials out there. Yet, the people with the know how, specialization, and creative juices aren't sharing. All I can think of is poor me starting out. Looking for help on how to do something I was so inflamed about trying and finding little tips, here and there. I am now grateful for the lack of info and the mistakes I've made. I might never have know the tricks, I do now, if I hadn't walked around blindly shooting what I thought would work. I have friends here in Austin, and some online, who think otherwise. They ask me for hints, tips, and suggestions. I am always surprised at how they interpret and what they return. But how many rolls would have produced better results if I hadn't had to feel my way around this?
We need a site. An online compendium of our collective knowledge. The basics, tips, variations, and everything in between. We need artists, who are good at multiple exposures, to share their wisdom and allow us to show/link to their work. There are so many amazing multiple exposure photographers I have run into on flickr. If we could get all of us to create our own page for the site displaying our approach, tricks, and examples, there would be an amazing resource available.
Not just for the new people. We would all benefit from each other. Lately, the only way to know how someone did a cool, shot is to read their flickr notes or e-mail them the question. Not everyone puts down their methods, film type, and settings.
This is a call to arms!
If you love multiple exposures. If you want to get better at it. If you are tired of explaining it to people and seeing their eyes gloss over. If you want to help new people at this brilliant type of photography. Throw your hat in the ring.
Let me know. It won't be an immediate solution. It will take us time and some effort on our part. It might be a year before it is up and running.It might be shorter than that with the right people involved.
That doesn't matter.
Let's do what no one has done before us.
Let's build a site where all can come to discover, help, showcase, and promote
Multiple Exposures.
I am willing to reach for it and make it happen if you are.
To add your name to the list of people willing to make the effort and contribute to this, email me at LomoCamRuss@gmail.com I will add you to a list for when we start rolling on this.
I believe we can do this.
Also, I have a website of my own, now. You can contact me there.
You can also keep up with my photography on my
flickr
You can get frequent updates on my process, progress, and showings on my
Artist Facebook Page.