Thursday, December 31, 2009

Don't Doubt My Commitment to Sparkle Motion

We've been playing with Sparklers recently. Light drawing and using them for illumination. I am going to try and pick up a large amount today before the stands close.

We started out with just running around and seeing what it would look like. Some LC-A+RL test shots. Shot on Fuji MS 100/1000 multi-iso film and cross processed. Iso on camera was set at 400.

Note: all shots in this post are about 20-25 seconds long. The sparklers only last about 30 seconds and it takes 5-10 seconds to get in position and start once lit.


Some Double Exposure action here.


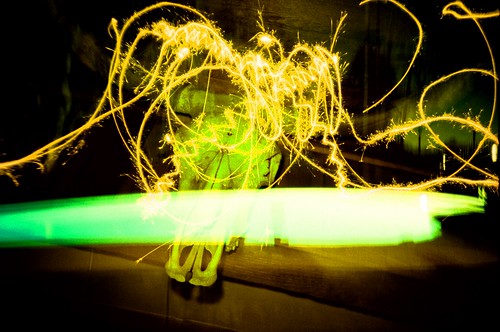
I took a shot on the Holga 120 at the same time as the first LC-A+ shot, to see what the lens would do. Held open manually. Also on Fuji MS 120 100/1000 multi-iso and cross processed.


Once we had an idea of what it could do, we started branching out a week later.
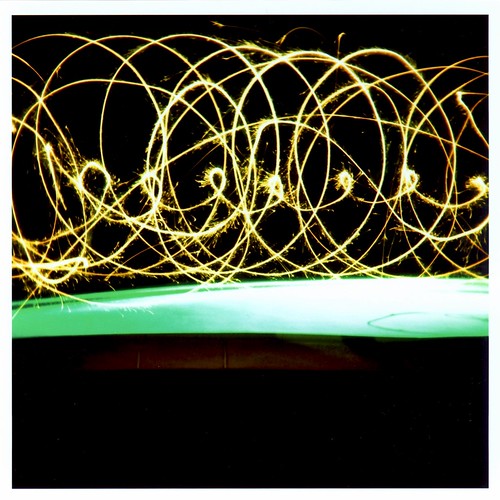
The Holga makes long exposures easier, so I have been using it. I wish covering the light sensor on the LC-A+ wasn't the only solution, but I might start doing more of those.

Holga 120n/ Wide Angle Lens/ Cable release/ Fuji MS 100/1000 multi-iso/ Cross Processed

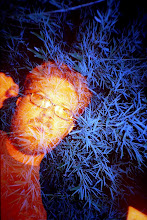
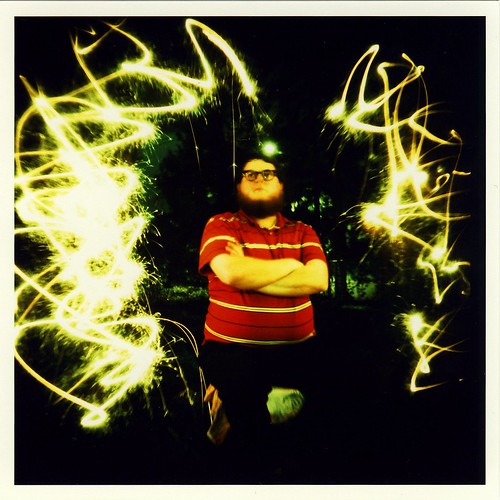
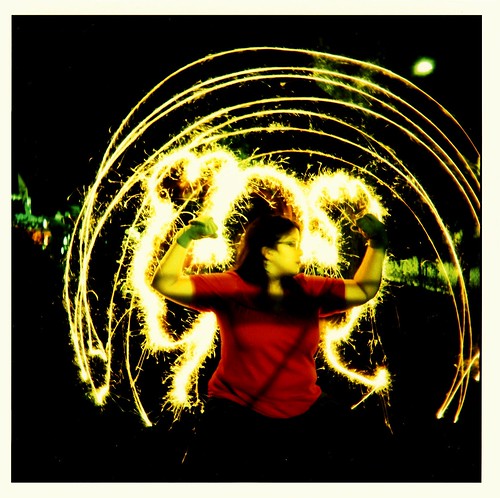
I had Rickey stand in the yard and swirl his arms all around without moving from where he was standing. It created a natural sphere. I would like to do this with Sparklers on strings sometime. The additional light blurs in the center are from some light wands we tried to introduce into the shot but they didn't take. Adds something, though...
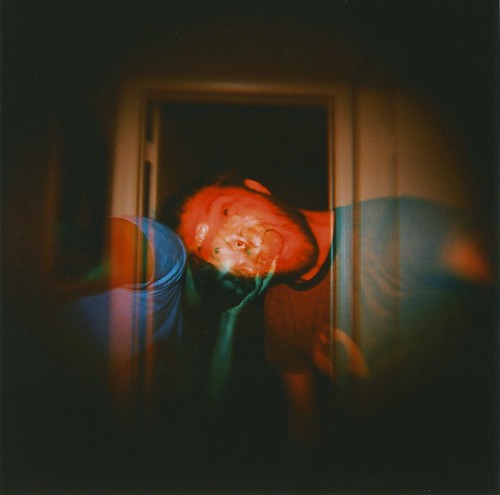
Rickey


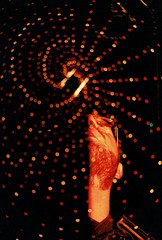
Then it struck me! Portraits with Sparkler enhancements.

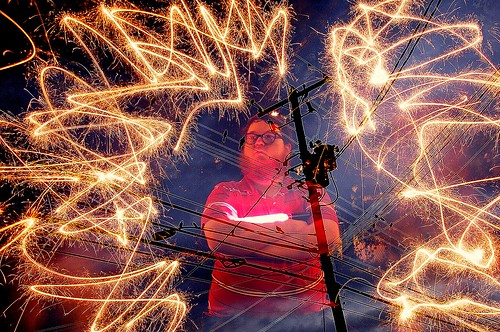
So I had Kevin sit down and we did a long exposure of sparklers creating jagged power burst-type lines. I popped a flash at the end because I didn't know how much illumination the sparklers would give off. More on that in a sec.

Kevin


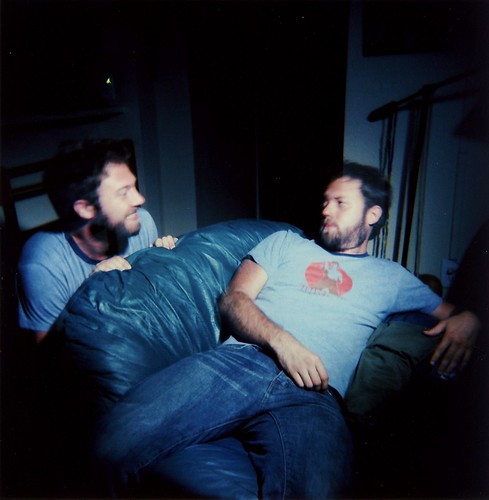
We tried a few variations. All were fun and there is a lot more room for ideas.

Me


Rickey - Flash used at the end


JenJoJenJoJenJo - Flash used at the end


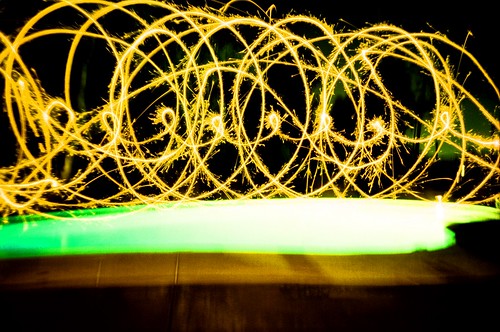
We tied a sparkler to a stick to get the longer reaching waves on this.

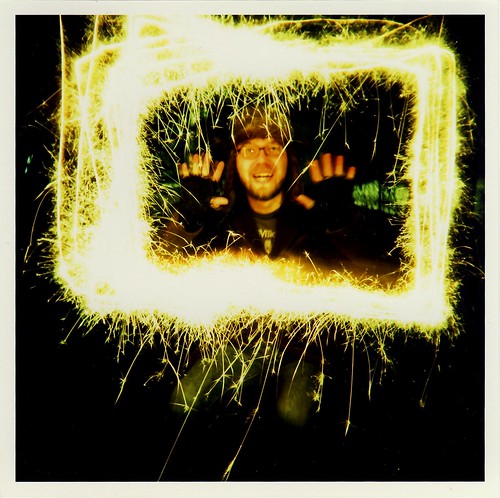
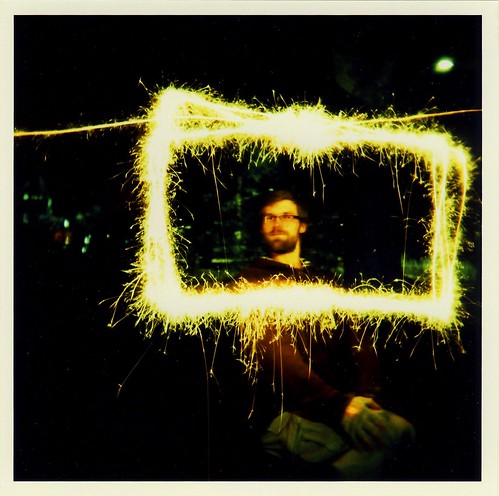
So can you illuminate someone enough with just sparkler light and a 25 sec exposure?


Yes, but it may end up being too much light. I suggest holding the sparklers at least a foot away if you aren't going to be moving them. If you are drawing frames, then the light is more easily distributed. The shot of me in a frame was taken without a flash and the even distribution of the light drawing a box is what makes it have such a nice glow. I love the lighting.

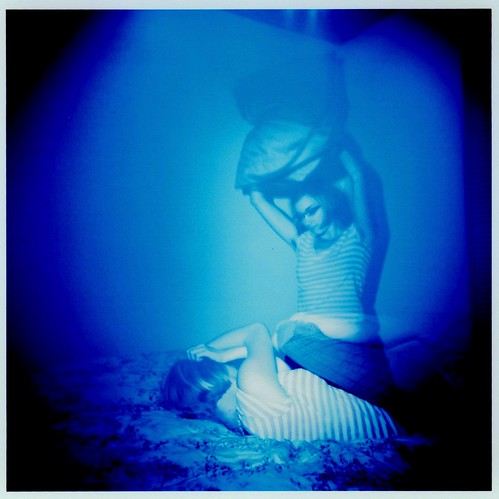
This was an accidental double exposure. One was supposed to be Jen framed and the other was her drawing a sphere. It becomes a little more abstract this way.


So I want to throw in 2 shots from my Canon SLR that I did with Sparklers. I know it's a lomo blog, but this is a little extra and its nice to have the sparks in such sharp focus sometimes. I took a lot more but I don't want to unbalance the lomo theme of the blog.

Canon EOS Rebel 2000/ 17-50mm lens/ Kodak Elite Chrome VS 100/ Cross Processed

Red and Green Sparklers burn brighter it seems and they produce more smoke. This can have a positive effect if you know how to play with it. I'm still thinking.

Kelly - used a green flash on this at the end.


And a shot I took Of Kevin and accidentally double exposed. Yes I sharpened the shot a click too much but I like the way it looks.

Kevin - Red flash at the end.


So there you go. Feel like drawing with something different than LEDs and standard flashlights? Want to use a new source of lighting that can add a strange feel? Creative portraits? All here. I hope this helps some or amuses a few. Until the next time. Keep snapping and may your eye be ever hungry.

LomoCam

Thursday, November 5, 2009

Exposure of yourself and others: Multiplicity

For my first (real) post, I want to talk about exposing yourself multiple times! Sure you can do it or your friends can do it. It takes little effort.

Here are a few examples of what I'm going to explain.

Me


Rickey


Mary


Here are the things you need: (as always I encourage improvisation.)
-A camera that allows multiple exposures (ie- LC-A+, Holga, Diana, Smena, etc.)

-A Tripod or anything that will ensure the camera won't move between exposures.

-A cable release or other way of holding the shutter open without moving the camera.

-A powerful light with a focused beam. Keep in mind that choosing an LED/Incandescent Bulb/Tungsten light will alter the shots color. Play with it.

-A Dark environment. Practically devoid of all ambient lighting. Basically, the darker the better.

Now, the whole point of this exercise is to prevent the usual ghosting you get with multiple exposures in well lit situations. We are trying to get there to really be two or more of the subject you are shooting. So the darkness helps prevent that as well as the narrow beam light.

Example of ghosting
I took this shot with the holga 120 CFN. Once with a blue flash & then with the red:


Setup in your darkened location:

Give yourself about 4 1/2 feet to 9 ft to shoot this. More if your light is powerful enough. You can also get closer to subjects to light them, but I'll get into that later. By now you probably have an idea about how this will work. Pick your subject and background. set your focus for the first exposure and have them take position.


Procedure:
Using your cable release, open the shutter while it is still dark. Then, you will point the light at your subject from whatever direction you feel works for the shot.

Now, when you turn on your light, your goal is to only light them and not too much of the environment around them. That is, if they are going to do a 2nd pose close to their original. If the subject will be far from their original position, then paint the area around them with as much illumination as you want. Just don't over lap the place where the subject will be standing.

Paint your subject with light. You are really doing slow sweeping gestures. It shouldn't take more than 3-5 sec to cover your subject. More than that will cause your shot to get blown out. There may be times where you want to blow out a few sections of your model but light the rest correctly. Play with this and see what you come up with.

Once they have stood in their first position, you can either turn off the light and have them reposition, or if it is a more complex setup for a 2nd shot, close the shutter.


Once you have the second pose setup, you can re-open the shutter or turn the light back on if you never closed it. On your second round of lighting the shot, try not to cover the area the subject was standing in previous. Also, if you lit the surrounding environment well in the first shot, then go easy the next round.

Remember, the less light around the position where the model is going to stand or stood, the better. This prevents Ghosting.


That is the basic gist of things. Experiment with having someone light your subject from close up but they should stay out of the light's "sphere of influence". Light only partial areas of a living room environment or forest scene. These changes can drastically alter the mood of the shot. Also, use different lights for the same shot or cover them with gels for different effects and moods. There are a lot of clever combinations you can do.

For these examples I was using a Holga, as they are so easy to use for multiple exposures. Just keep clicking away. I was using a LED Shop light for the lighting, except for the shot of Rickey in the tree. That is extra dark because I only had the Lomo Ringflash on me.

I hope you found this helpful or fun or exciting. I always like to tap into other people's ideas and start bending them to my will. Get out there and start snapping shutters!


Too Long, Time to warm the engines

I know I've been gone before I was here..., but now I'm going to try and make this work.

My name is Cameron and I am a Lomographer. I started on x-mas day of '08 and I haven't stopped since. I am starting this Blog to catalog experiments and because you have to start somewhere. I've been posting to Flickr for a while now and the Lomo Homes site for the past few weeks.

With all that effort I was feeling a bit daunted by the task of actually blogging about them on top of the other things I was doing.

I shoot on several cameras:

LC-A+RL


Holga 120


Smena 8M


ColorSplash Chrome


My Main love is
Multiple exposures
. I can't help but try and find new ways of doubling and tripling images.


This will be an attempt at a Lomography Photo blog. While I don't think I will always use Lomo cameras, I feel that the spirit of Lomography is already in my photography so the two may never be separate.

I'm new at photography and newer at Lomography. I have been told that my pictures show I have a good eye for what I do. I want to use this as a catalog of what I tried and the results. I experiment more than I study. I never edit in Photoshop. In some cases I may darken the shot or increase the highlights, but it is a small cosmetic adjustment in Picasa. My scanner isn't always spot on.

For all who care and for those people out there, like me, who needed something to release them from the day to day. I present my passion and hope you take away something positive like I do.

Tuesday, June 2, 2009

A small start

I'll be posting to this soon, so add it to your feeds. I was just interviewed on Our.City.Lights blog, and it was a great honor. I created the blog over the weekend but I doubt you can say it has really been created yet. I'll try and pull this whole photo circus together at work and tonite. Until then,

Lomo-Cam