Monday, March 8, 2010

Shadows, shades, & darkness: Your Multiple Exposure Paradise


Last time I wrote about double exposures, I tried to cover a broad cross section of approaches. In this entry, I want to talk more about how double exposures work and what you can look for. It is a meditation on darkness, shadow, & black holes.

I had a sit down with some folks last night who were interested in taking better multiple exposure shots. I hadn't realized what I knew versus what other photographers knew about it. I have only shot film for a year and 70% has been multiple exposures. It's the medium I prefer. In talking with these folks, I began to understand what I have come to know, almost innately, about what does and doesn't work for multiple exposures.

Once again, I am no expert. I haven't taken classes or had a chance to work with a mentor. I welcome that, but it hasn't happened yet. I am not saying this is the end all be all of double exposures, but I do think I have a darn good grasp on the subject and part of it comes naturally to me. I know how to make the accidents happen.

Here are a few of the things we discussed and what advice I was able to offer.

+ Film needs light:

What? Of course film needs light. But here is what I'm getting at. On an exposure, if the first shot has solid contrast between light and dark, like a silhouette, then you end up with spots on the negative that haven't gotten any love. It's empty. So what happens on the next exposure? You have a negative space to fill. The rest of the shot has already left its impression.


+ Darker Colors are your friend

When you double your shots you need to decide what you want to be your primary focus. You can blend two images together or use one as a texture. Either way, if you shoot bright yellows, whites, light blues, pastel colors; you will have those colors come through more. Dark blues, greens, reds, browns, and grays; will be muted and lend their textures and form more than a true solid image.
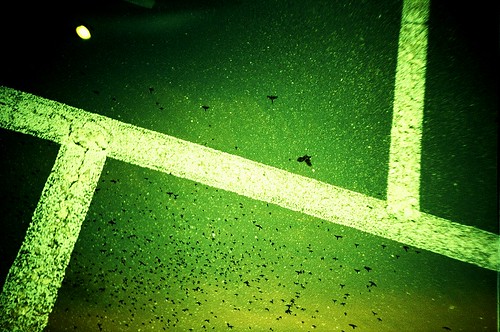


Parking Lot vs Birds at Sunset:

A great example and favorite subject of mine, is asphalt. Streets and parking lots with nice dark blacktop makes for awesome doubles. You can capture parking stripes and a lot of rough texture from these. Depends on how much light you let in on the second exposure. In this one I shot with Fuji MS 100/1000 multi-iso. Shot both at 400 iso. If I had wanted more texture from the parking lot, I would have snagged the sunset at 800 iso. What makes this possible is the small amount of light the asphalt is reflecting back at the lens. Of course, the parking stripes were white, so they showed up without an issue.
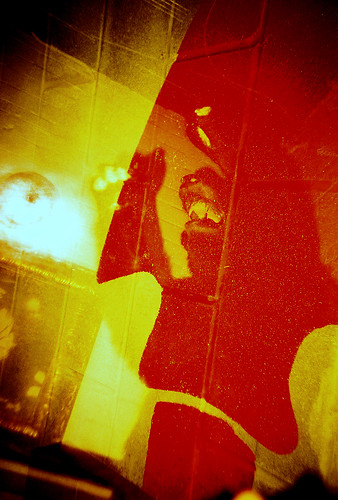


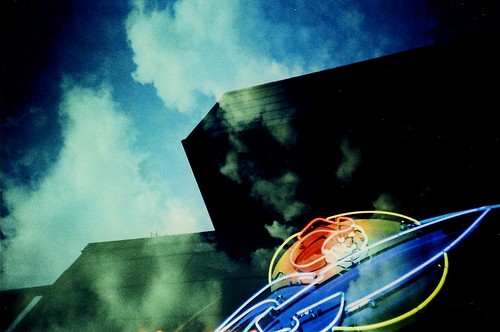
Yellow vs Red:

In this shot, you can clearly see the bear through the red colors of the arrow head. The parts that fall into the yellow zone are much harder to see. A good example of the dark vs light colors.


Erica VS Red Dots:

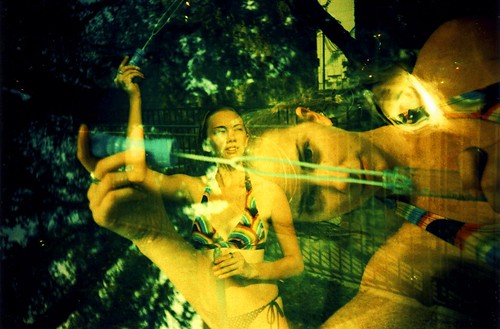
This is a great example of black sucking up light. I shot this cinder block wall during the day. It was painted a matte black with red polka dots. I shot the whole roll at different angles and distances. It was 400 iso film and I shot at 800. Then, that night, I shot Erica at 400 iso using my Colorsplash flash. The red dots stay put while the black fades away and fills up with the 2nd exposure.
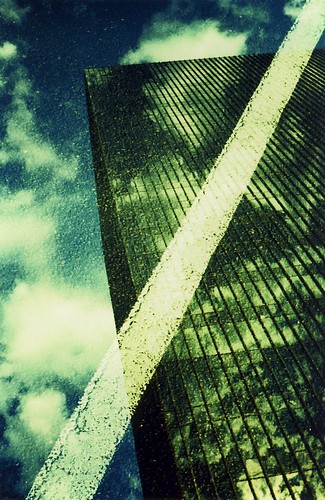


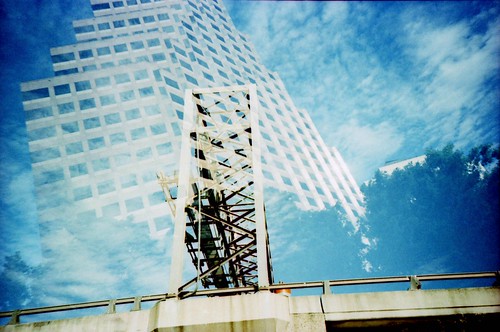
Building vs Road Stripe:

A good example of texture but no color from asphalt. The building was well lit and the parking lot stripe is the only color that remains from the first exposure.
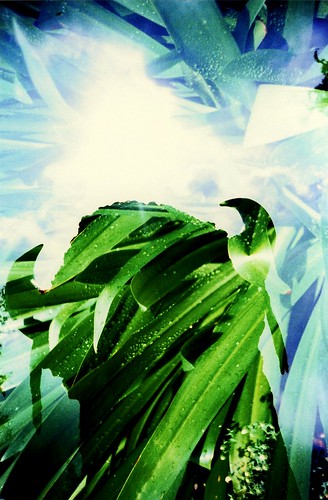


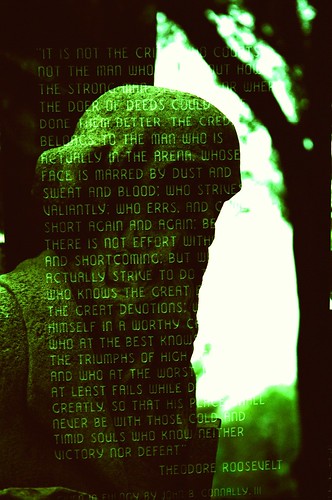
Statue vs Plant:

The plant was exposed first, which is why you can see all of it. Then, the silhouette created by me being behind the statue shooting toward the sun created the darkness needed for the plant to stay the primary image. It fills in where it was darkest, but is blown out by the sky around the shadow.
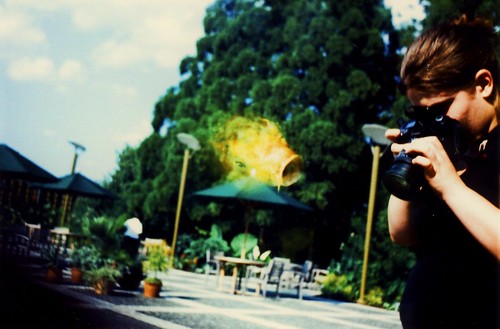


Macy vs Ghost Fish:

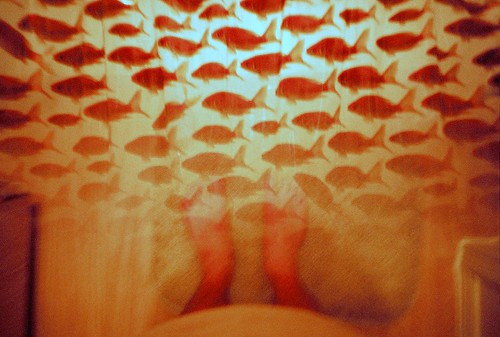
This one didn't look that neat to me when I first picked it up from the developers. A second look made me smile. The first picture was of a koi pond at the National Arboretum. The water was so dark, the orange koi was the only thing that came out from the first exposure. The second exposure of Macy taking a picture of the pond made the fish float in front of her.
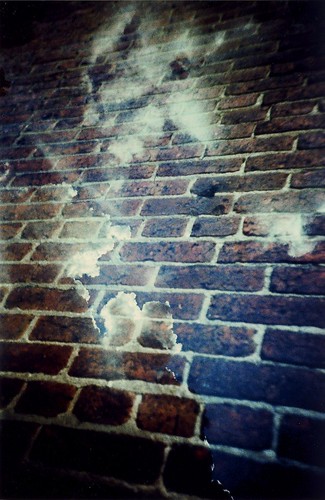


Brick vs Sky:

This is an example of darker colors helping out. The bricks weren't black but dark reds, maroons, & crimson colors are all going to work, as well. The bricks weren't getting any direct sunlight so they added their texture and image without being to overpowering. The sky was bright in places but the clouds helped to keep the bricks visible. Had it been a bright sky w/o clouds the brinks would be far more subtle.
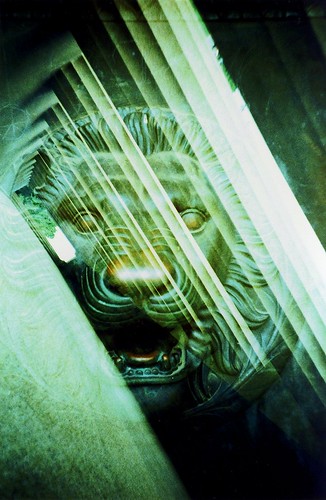


Lion vs Columns

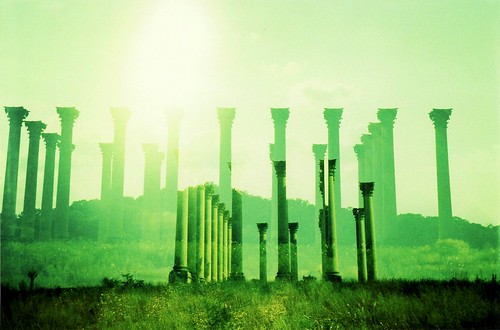
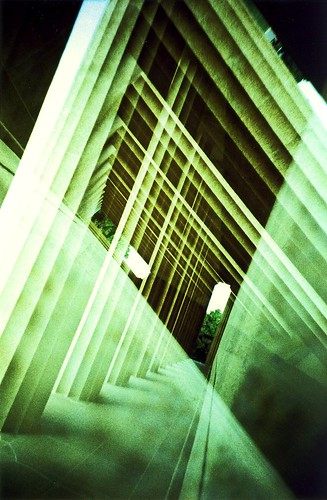
This one deals more with shadows. In this, the Lion head was on a door that was heavily oxidized. The door it self was too dark to really make its presence known. The columns were very white concrete. They should have blown the lion out of the shot, save for a few subtle features. Instead, because the hall of columns has so much going on with the shadows they create, the lion head comes through clearly wherever the shade is.


Eddie vs Reed Thatch:

In this one, I used a blue flash to bring the whites out on the Eddie Munster stencil. Then, I used an orange flash on the reeds. This pushed the reeds through the black part of the stencil while my first flash held the white part of Eddie in place.


Tile Corner vs Wooten Bldg.:

The darker color tiles in the corner of a restroom that wasn't brightly lit make for a shadowy texture over a well lit day pointing the camera away from the sun.

+ Night time is the right time for doubles

So, obviously, if darker colors and blacks are favorable in double exposures, then night time and clever flash usage should give you great results. You already saw the Erica vs Red Dots picture. That is a prime example. You can control what gets exposed on film better when you control the lighting of your subjects. Neons, Signs, clever flashes on walls and friends; all of these can be used to great effect.


Rickey vs Fire:

A simple example. I shot the bbq pit without a flash. So the fire is the only thing that will really show up. Next I grabbed a shot of Rickey with a green flash. I shot upwards, so I wouldn't catch any background imagery.
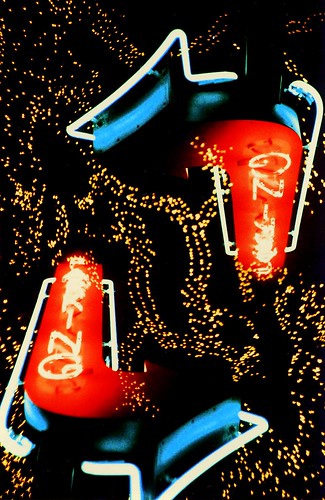


Parking vs Parking:

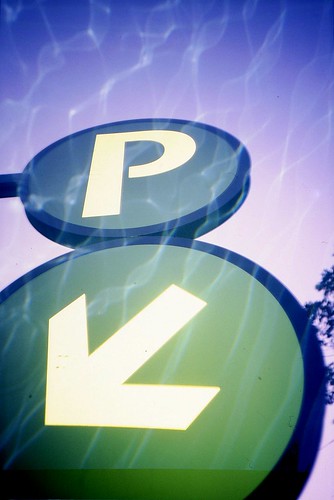
This shot is an inversion. A neon parking sign with a x-mas light covered tree in the background. I shot this once, flipped the camera, and shot again. I was shooting with 400 iso and no flash. I grabbed only the most powerful light in the scene and left all the unnecessary bits out.


Bench vs Ladies:

In hind site, I should have used a yellow or orange flash for one of these exposures. blue and green are too close together and don't differentiate enough. Still, green flash on park bench and blue flash for the ladies. They mesh together a bit, but there isn't anything else left to interfere with the shot composure due to the night time's loving blackness.
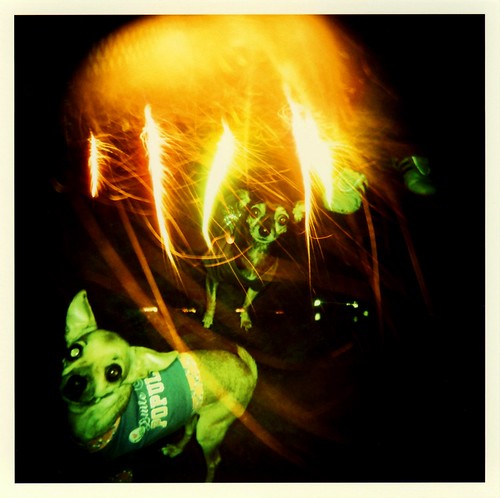


Pups vs Roman Candles:

This was a bit more inventive. I shot a whole roll, in my Holga, of roman candles being shot over it and around it. Then, I rewound the film and shot some family members and the like. The dark environment means I can shoot the puppies with a flash and isolate them from their context and layer them over something else.
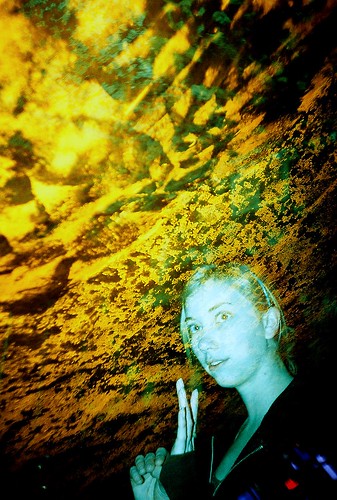


Mary vs Ceiling:

This one was a combination of dark colors on the ceiling and the angle of my camera & flash. The ceiling gets a more left dominant exposure while Mary gets a blue flash and right dominant placement. So the flash illuminates both corners of the shot due to the way I angle my camera away or towards the subject.
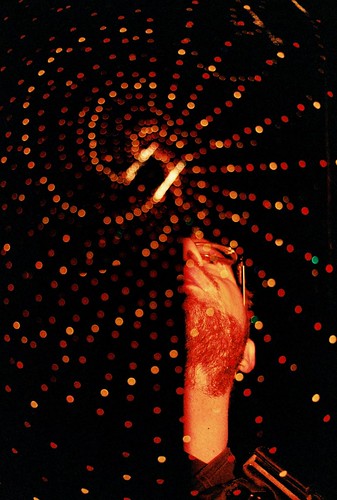


LomoCam vs Bokeh:

I'll admit this one was a complete accident. I took the shot of the giant x-mas light tree above me, unfocused, for the first exposure. Then I used an orange flash for my face. Turns out the flash was blocked by the extension of the SLR lens. So only half my face gets lit. Weird effect you could only have gotten at night.
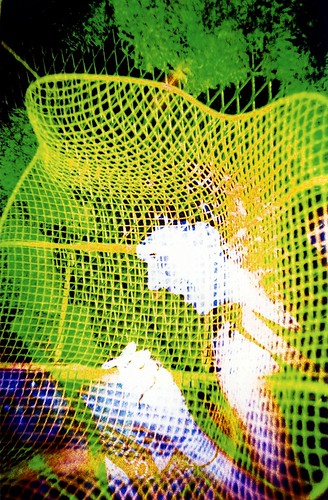


Unknown Lady vs Wire Chair vs Metal Mesh Wall Covered in Moss:

So this is a triple. Which is why the gal's face is all blown out white. Too much light at the center of the shot after 3 exposures, I guess. Blue flash for the woman, Yellow flash for the chair, & green for the metal mesh wall covered in moss. Each is able to be isolated and added to the shot with a flash because the night conceals what your flash doesn't touch.


In the end, these are just basics. Ideas to grow from. I'm not telling you to shoot the way I shoot. Just use this to understand how your environment responds to color and light for layering shots. The only way I figured all this out was shooting loads of film and searching through other's double exposures on flickr.

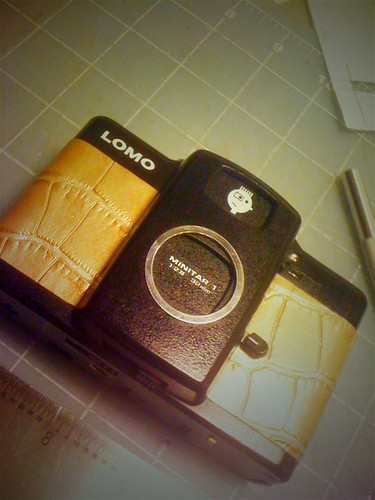
Yesterday was my 1 yr anniversary of shooting on my LC-A+RL. The camera that truly gave me a handle on double exposures and helped me refine my methods. I have taken over 3700 pictures with this Lomo in the last 12 months. 75% were doubles. I love this camera and I dedicate this blog entry to it's glory and magic it brings out of my life. Keep Snapping Shutters! Make your pictures worth 2000 words.


Monday, January 11, 2010

Doubling for the Sake of Magic

I love double exposures! I can't help myself. I want you to catch the bug as well.


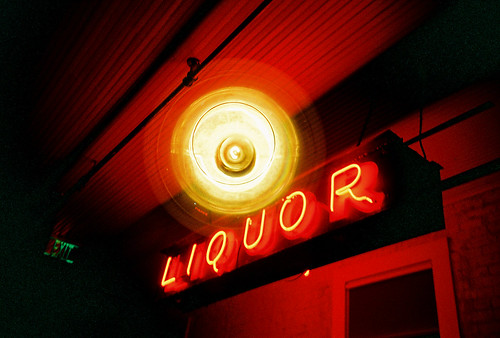
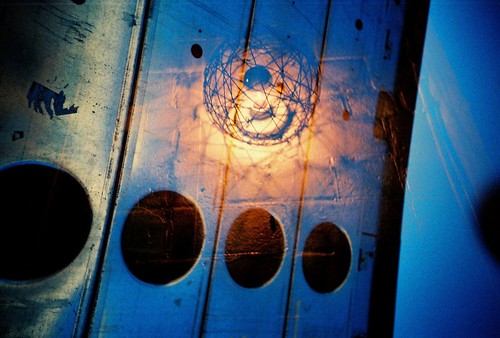
This is one of the first double exposures I took with my LC-A+RL. First roll on a night out. It's a light bulb with a cage around it and a security door at a club called the Mohawk. I started realizing the possibilities of doubling and multiplying shots.

I had tried it with my Holga, before but I just couldn't seem to get a solid double image. I later found out that I should have been shooting on 400iso not 100iso.


I have found that several cameras I use do very well with double exposures. Any camera that has a shutter cock separate from the film advance is a natural. Other cameras, you have to trick them by teasing the rewind and tricking the camera into another shot.

I love double exposures. It is 75% of the type of pictures I take. It was the thing that fascinated me the most about Lomography. There is something to be said for taking the mundane or normal aesthetic and mixing it with something it may never meet. It opens up a wider avenue for creativity in photography.

I'm going to talk about the cameras I use for multiple exposures. Then, I'll touch on what I look for to make a good double. We'll go over the different types of multiple exposures you can do. In the end, I hope you can walk away with a new fire in your eye that needs double the quenching.

Here are the cameras I like doing doubles with:
Favorite- LC-A+RL :


Fuji MS 100/1000 multi-iso Cross Processed
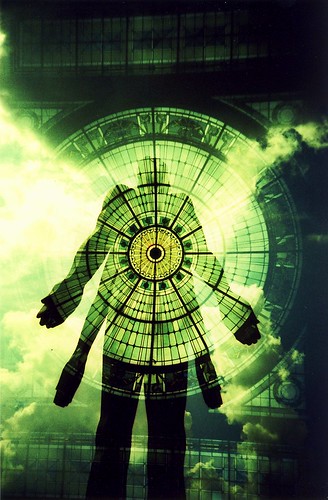
This was a shot at Penn Station in Baltimore, MD. I was getting out of a taxi and trying to catch a train. I saw the statue across the street and ran over to snag 2-3 shots. If I see something I really like I take about 3 shots. One to double over something I might have already saved, one as a single image and then another to save and double over the next thing I see. It's like shot insurance. So as soon as I ran inside the train station, I see this amazing stained glass above me. Without thinking I set focus raised my camera and shot as central as I could. The two shots lined up great even though I forgot about the statue being on there already.


Smena 8M


Kodak Ektachrome 100iso Cross Processed
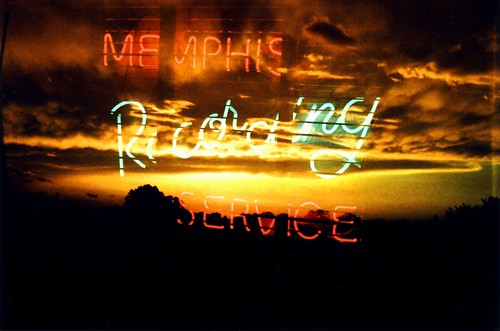
I took the first shot of the neon sign, inside Sun Studios in Memphis, TN. We were taking the tour and the old neon sign was on display behind some blinds. I grabbed the shot with the Smena and forgot about it. Later, on the drive out of Memphis, there was a gorgeous sunset and I had to get a shot.
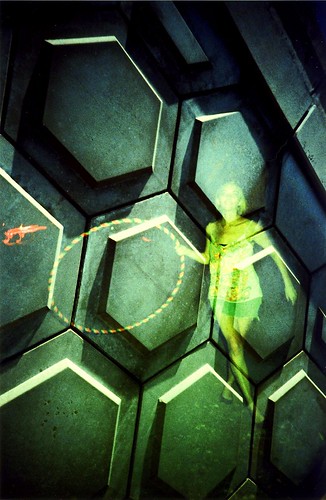
Note: a friend later pointed out that the sunset really looks like a beach cove with trees in it. I totally see this and am in awe of the secondary vision. This taught me to let people see what they want, first. They can interpret the images in such new and wild ways.
Smena 35:


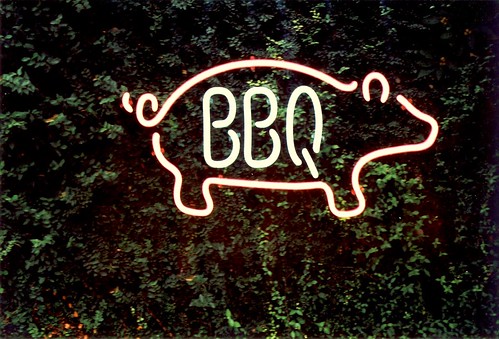
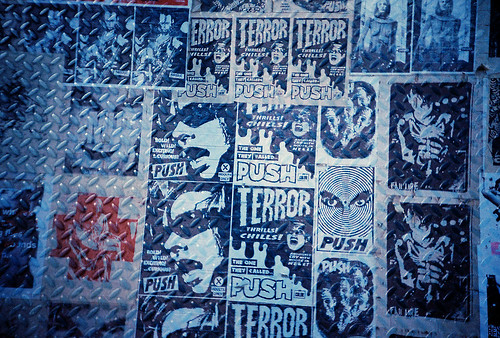
This is a good example of using darkness to your advantage in doubles. I was in a bbq place and saw this pig neon as part of a beer sign. I got up close with no flash and snagged a shot. After that, I was taking a walk down the street and saw some lovely foliage coverage. Thought it would fill in the dark spots well.
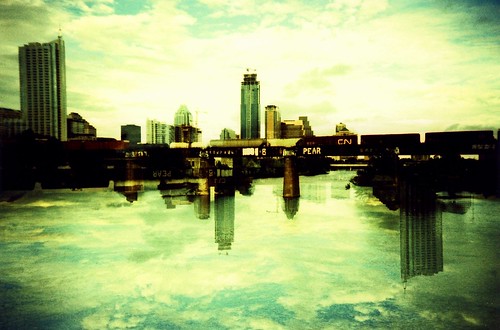
Remember, Anything that is black or very dark will always be dominated by the next shot, if it is at all brighter.

Holga 120N:


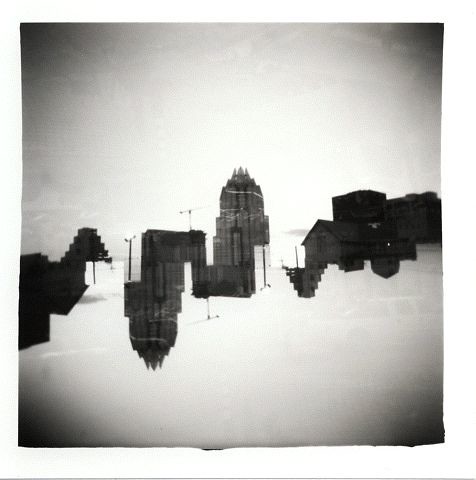
Here I did a simple double exposure trick. Inversion. Take your shot and then flip the camera. You get images that look like reflections, if you shoot it this way, or you can have them crossing each other and forming new images and patterns. I'll discuss this in a later blog about inversions.

Canon EOS Rebel 2000 SLR:


Fuji MS 100/1000 Multi-ISO Cross Process
Apparently, a lot of film SLRs have the ability to multiple expose, built in. I wonder why I haven't seen more of this from SLR users. This shot was at the Texas State Memorial Cemetery. I found a dark grave marker with white engraved letters. So they stayed visible on the second shot with the statue.

What I think makes a good double:
I love multiple exposures but what really ruins them for me is when they are too busy.


Or when they lack a specific focus-


I always think about whether or not something is a good texture or pattern to pair with something else. Just try and keep it from being a messy shot crowd shots mixed with pipes, a table with plates and dishes on it mixed with a leaf pile, ect.

I don't always think about what I just shot or will shoot, but I try to keep a steady idea of whether it was a busy or simple shot. There is a benefit to remembering your shots and to forgetting them. You'll see. The accidents almost mean more than the planned.

Methods to Multiply:

-Film Speed Settings-

So, there are several ways to approach double exposures. First, you have to realize you are giving the shot 2x the light it normally gets. You have options. You can leave the ISO setting to match the film speed and hope the shots aren't blown out. Sometimes this works.
LC-A+RL


In this case, it was dark enough that I didn't blow out the shot. Over at Lambert's Fancy BBQ I got their big neon sign and a shot from directly below a pendant lamp.

You can set the ISO a stop down. So if the film is 100 iso you set your camera at 200. Better for daytime or flash shots.
LC-A+RL - Agfa Precisa CT 100, Cross Processed


Here I shot the sky first and the neon sign/building second. Because it was daylight outside, I cranked it down a step.

Next you can crank your shot down two steps for textures you don't want to dominate your central image. So you have 100 iso film, you take a shot at 400 for a texture and then 100 for the central focus of your picture.
LC-A+RL - Kodak EBX 100 Cross Processed


This was a white wall with pealing paint. I knew it was going to bounce back a lot of light so I compensated. In the end, I realized that this was the best way to add subtle textures to my double exposures.

-Ways to Double a Shot-

You can shoot through a roll and then rewind it to shoot through it again. This is ideal for those who can't trick their camera into letting them do multiple exposures.
Here is a vid I found that helped me avoid crossing over previously shot frames:

It also allows for creative mixing of themes. As much as doubling on the fly is fun, sometimes doing a whole roll and re-shooting gives you the ability to bring two vastly different elements together that you couldn't achieve in the moment.

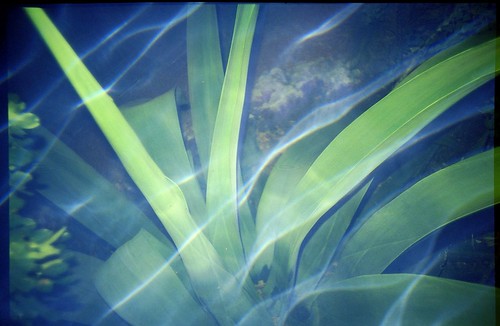
Here are a few shots from a roll I shot under water and reloaded for dry land doubles.
LC-A+RL -


There is a roll currently in my LC-A+RL that has a full set of exposures on it of a wall made up of Boardgames. I couldn't double those with other elements outside of the restaurant, without this technique.

Second technique is more on the fly. Cameras with built in multiple exposure control allow you to be more creative in the moment. My LC-A+RL's multiple exposure switch is well worn after 8 months of use.


Doubling when you're in the moment is great. You can do so many things. Combining elements from the same environment is like creating a collage of memories. Here are some examples of taking what would have been a normal picture more fun by throwing one or more shots together.
LC-A+RL - Fuji Superia 200 iso


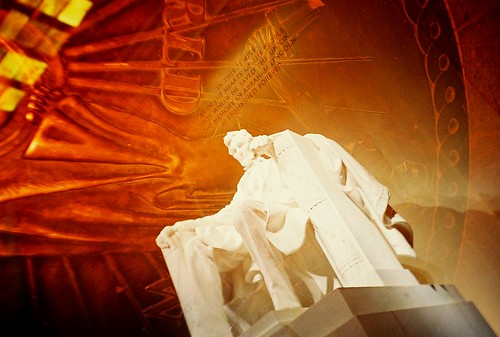
Everyone has a shot of the Lincoln Memorial that looks like some variation of the other. It's hard to take something fresh. I was messing around and took several shots combining elements of the structure with the statue. Some worked well, but this one used the copper disc in the floor as a secondary image. The words above Lincoln's head were well lit so the second exposure of the copper disc didn't blow them out (having the statue and words in white helped a lot, too). I liked this shot a lot and the DCist had it as their photo of the day about a week after I got back and uploaded the shot.

LC-A+RL


Maps are boring on their own. At least this one was. No offense, map lovers. I used a yellow flash on the map and went outside and did an out of focus shot of a tree. I didn't want the tree to be the focal point of the shot, so I made sure it wasn't a sharp image. I'd be lying if I said I thought this out too much, though. This was early days of doubles.

LC-A+RL - Lomography Redscale 100 iso


An antler chandelier is kinda interesting, but trying to get the lighting right and a good angle to make it look nice enough to hold its own in a shot is too difficult for me. I took this shot inside and on the way out to my car I doubled it with the parking stripes in the lot. Dark, moody, and more interesting.

What if you want to expose more than once? You can crank the iso down once for every shot but be aware of strangling your photo of light. 100 iso film shot 3 times at 400 might present a lot more ghostly images and less solid structure. You may like this?

LC-A+RL


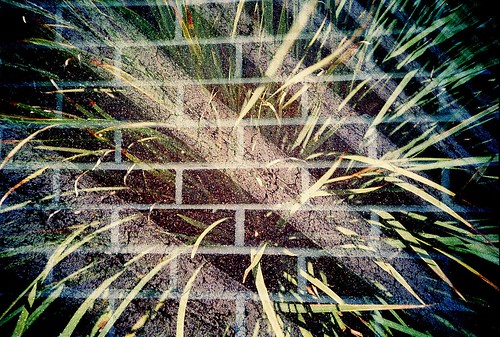
A triple shot on 100iso film cranked to 400iso. See how nothing really stays solid. It's all a little softer and whiter. Brick, plant, and parking stripes.

Don't crank it down and keep it a stop below the films rating.


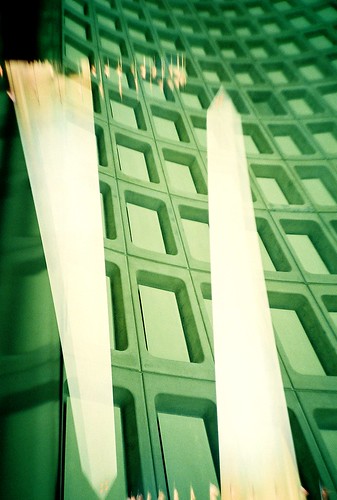
Here it was darker out, so I could shoot the Washington Monument twice and sake a third shot for a background. Notice the inside of the subway station fills in the background because it was all black before and the white of the monument doesn't allow the subway ceiling to come through. This was another thoughtless multi-exposure. I hadn't advanced the film from the monument flip shot. I forget things.

-Altering Colors-
I use a colorsplash flash.
It lets me change the mood of a shot and alter my environments. Sometimes I use the same color to meld the images together.
LC-A+RL


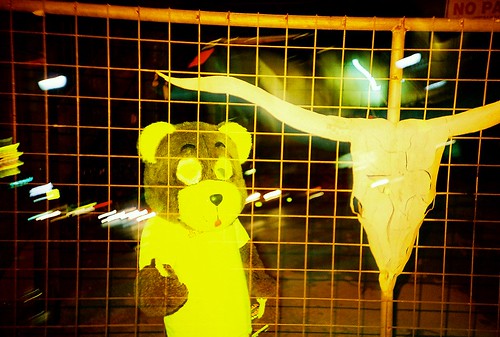
I had already taken the shot of the fence with nothing behind it so I only had the chain links reflecting light. The Bear-suited gentleman was standing on the street corner right after I took the shot. So, acting by instinct, I slid the "MX" switch on the LC-A+ and snapped a shot of the bear beast. So now it looks like the bear is in a cage, where he belongs.

You can also use it to differentiate your subject:
LC-A+RL


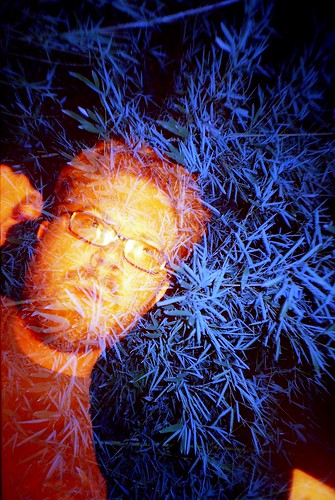
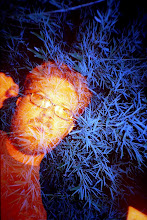
Here I took a shot of the bamboo, at night, with a blue flash. Then a shot of my face in orange. Because there was nothing immediately behind me, except for the night, the bamboo image stays solid and doesn't overlap.

You can also use a "Splitzer". This is a card or other flat object you use to divide the lens into segments. I cut a Holga lens cap in half to make one for it, & they make a custom one for the LC-A+.
In this case, you aren't always doubling the image over the other. You're segmenting and adding where you please. Here are a few examples:


Here's one where the colors, from the two flashes, blend in the middle and form a yellow.


Doubling People
Now I've
blogged about this before
so I won't go into how to accomplish this. Doubling people can be done two ways.

Ghosting-


Or Solid Doubling-


Multiple Exposures for Texture:
Sometimes you shoot textures to add a new feel to your normal pictures.


Inversions:
Flipping the Camera to create odd new images from the familiar.

You can Mirror the image-


Or Cause the image to fold in on itself-


You can also shift angles on the subject matter without inverting the shot-


That's enough for now. Next blog I'm going to tackle using darkness and negative space to your advantage in multiple exposures. I hope this has been helpful. If you have any questions, leave them in the comments section.

Until next time, keep furiously snapping those shutters!